Using the BMW E90/E92/E93 M3 (MSS60) Binary Modification Tool
First and foremost, ECUWorx offer no warranty of any kind, we are not liable if you break your car by incorrectly flashing your ECU/DME. You do so at your own risk!
You will require the following:
- A copy of the E90/E92/E93 M3 Binary Modification Tool, available here
Microsoft .Net Framework 4.0 or higher. Grab it here if you don’t have it. - A fully charged Windows laptop and an appropriate flashing cable and software such as MSS6x Flasher, Alientech Kess V2 / Frieling Racing I-Flash / Flashtec CMDFlash.
- If you wish to use MSS6x Flasher then all E9x M3s will require a K+D-CAN cable that is flashed with the EdiabasLib firmware. ECUWorx sells preflashed cables, grab one here. Without this type of cable, a DME brick is guaranteed.
- A trickle charger or battery tender that can supply 20A+ to your car whilst flashing. I use a CTEK MXS25.
- An E90/E92/E93 M3
First things first, hook up your trickle charger to your car and a power supply to your laptop.
Hook up your OBD2 cable to your car and your laptop and fire up your chosen flash tool.
Take a full read when given the option and save this file somewhere safe. In this guide I’ll be using Frieling I-Flash. I have also written a guide to taking a full read with MSS6x Flasher
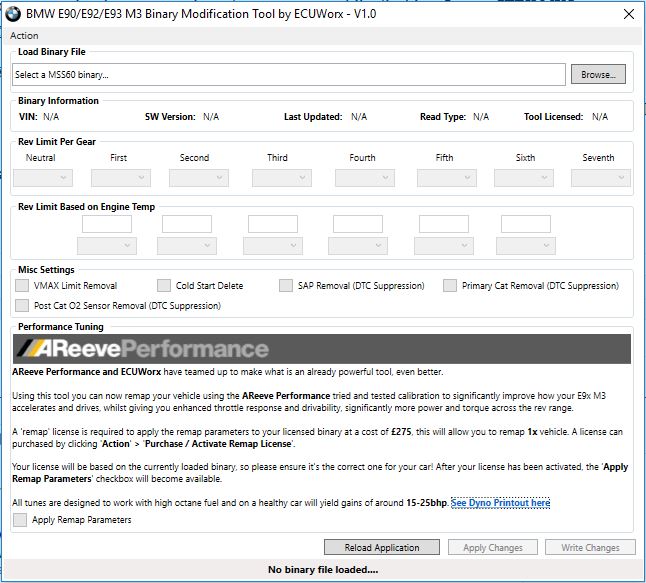
Once you have your full read, fire up the E90/E92/E93 M3 Binary Modification Tool.
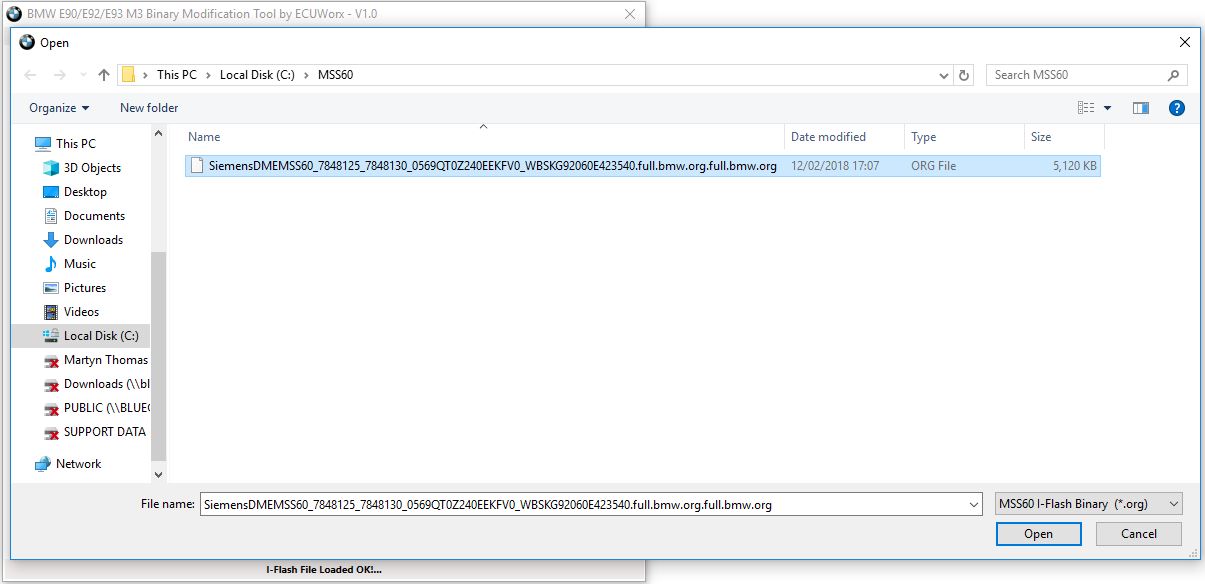
Click the ‘Browse’ button in the top right hand corner of the tool, and select the full read you want to modify and click ‘Open’.
If the file you want to modify is not listed, use the drop down in the bottom right to change the file filter. Here I am filtering on files ending in *.org.
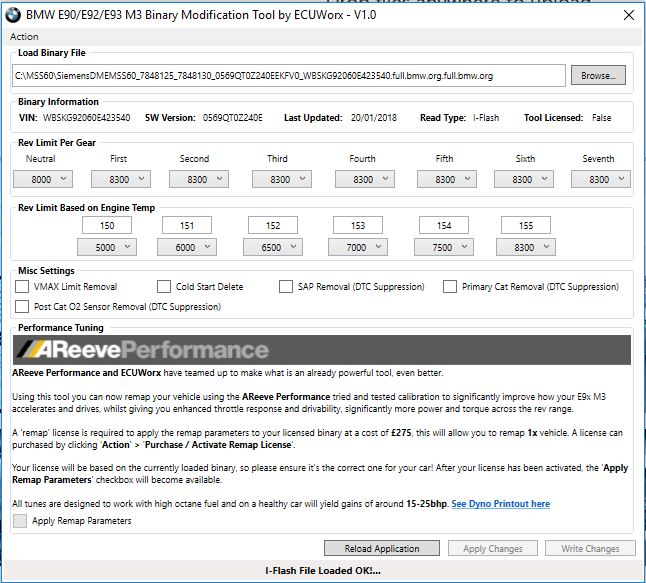
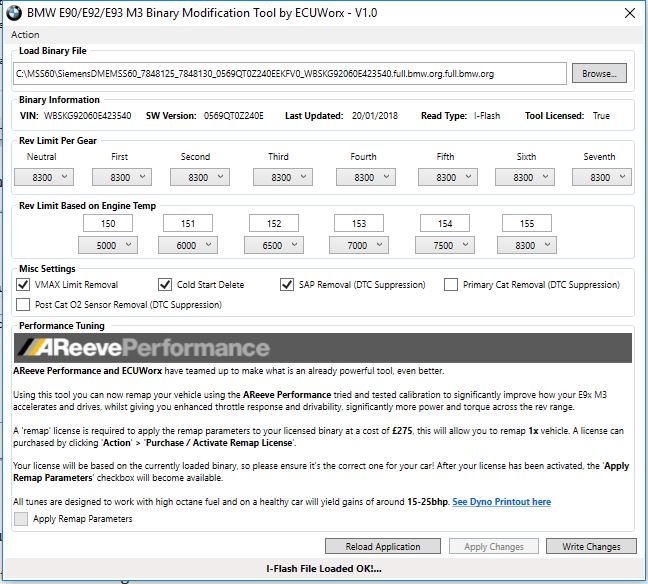
Your file will now load into the software and all values / boxes should populate with the vehicle detail.
If you wish to make changes to the file you have loaded, then a license is required.
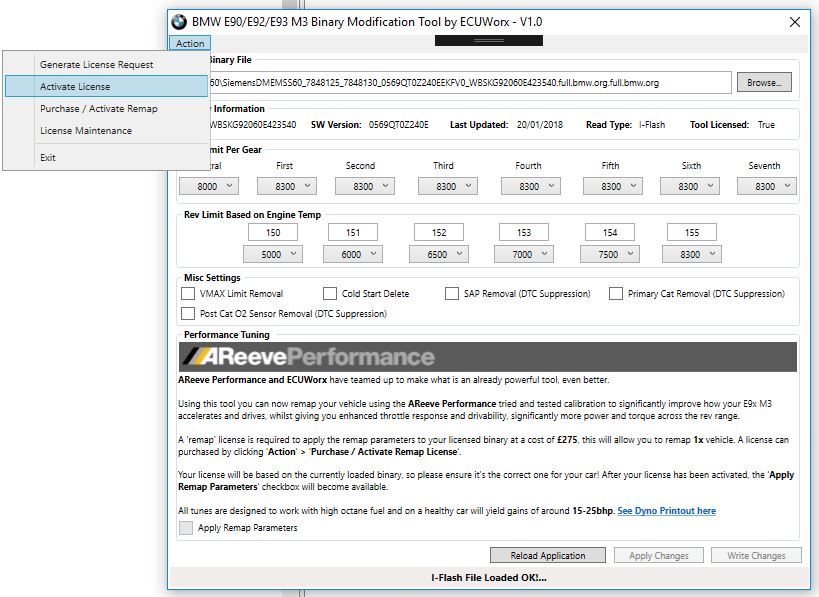
To request a license click the ‘Action’ menu, then ‘Generate License Request’.
Populate the license request fields with your name, a valid e-mail address and then select the license type required.
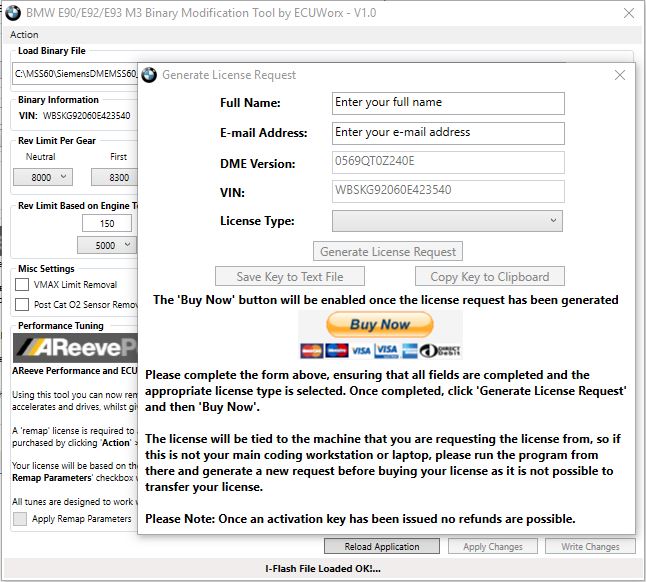
Click ‘Generate License Request’ then the ‘Buy Now’ button. Complete the transaction via the PayPal page that will be automatically launched via your default web browser.
After completing your purchase, close the ‘Generate License Request’ window and await your activation key. Your key is automatically e-mailed to you within a few minutes of purchase.
Once you’ve received the key, click ‘Action’ menu and then ‘Activate License’.
In the ‘Activate License’ box, paste your activation key ensuring no additional spaces, characters etc are added.
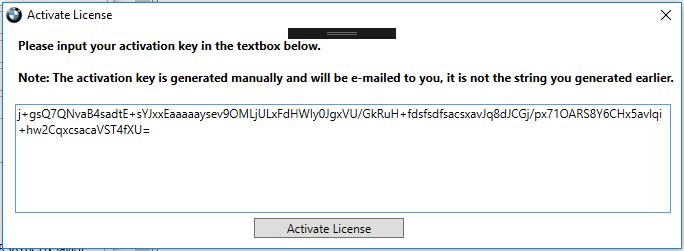
Click ‘Activate License’ and you’ll be prompted that activation was OK. The application will now restart.
Click the ‘Browse’ button and navigate to where you saved your unmodified backup.
Make the desired changes and then click ‘Apply Changes’ and then ‘Write Changes’
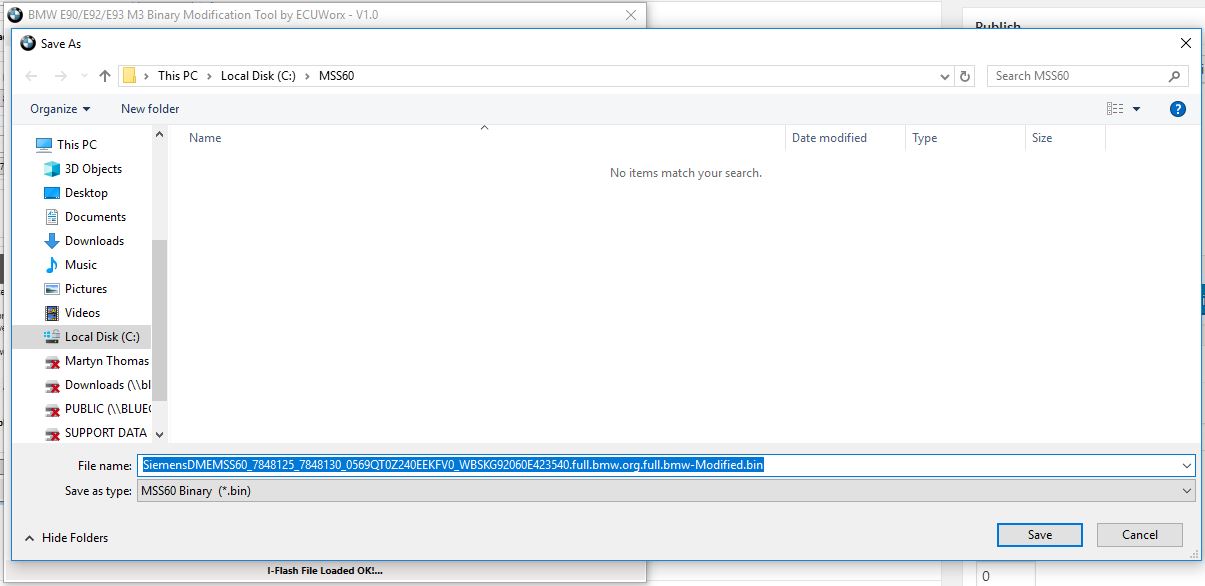
By default, the file will be saved in the same location as the original file, it’ll use the same name but with ‘-Modified’ on the end, and will be saved as a “.bin” file.
Once saved, close the tool and flash the file back to the car as usual.