Taking a read with MSS6x Flasher
First and foremost, ECUWorx offer no warranty of any kind, we are not liable if you break your car by incorrectly flashing your ECU/DME. You do so at your own risk!
You will require the following:
A Windows laptop with .Net Framework 4.5 installed
A copy of MSS6x Flasher, available here
A copy of the MSS6x Flasher prerequisites, available here
A copy of either the MSS65 (M5/M6) Binary Modification Tool, or a copy of the MSS60 (M3) Binary Modification Tool, both are available here
All E9x M3s and 2008+ M5s will require a K+D-CAN cable that is flashed with the EdiabasLib firmware. ECUWorx sells preflashed cables, grab one here. Without this type of cable, a DME brick is guaranteed.
A trickle charger that can supply 10A to your car whilst flashing. I use a CTEK MXS 10 (Recommended, but not always required if your battery is good).
Before proceeding any further, please pay attention to the FAQ on the MSS6x Flasher page
First things first, hook your car up to the trickle charger, and your laptop up to its charger.
Plug your OBD2 cable in to the laptop and to your vehicle. The OBD2 port is usually located by the drivers footwell, by the hood release.
Download MSS6x Flasher and extract it to a directory of your chosing.
Download the appropriate ECUWorx Binary Modification tool and extract it to a directory of your choosing.
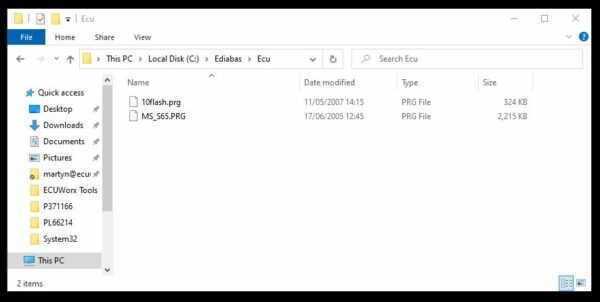
Download the MSS6x prerequisits zip file and extract it to the root of your C: drive.
The zip file should then create the following directory structure:
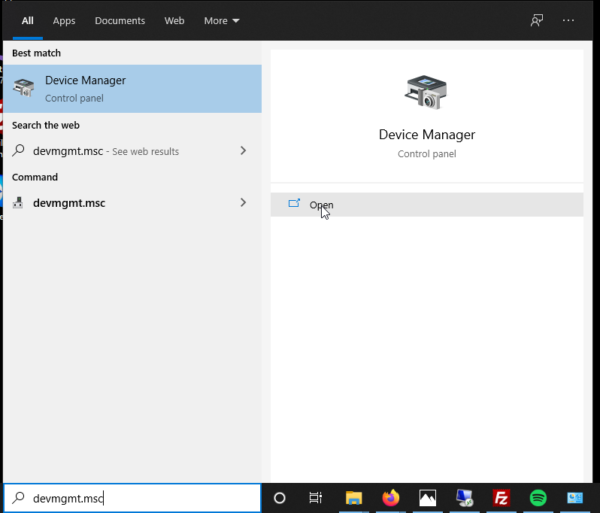
Now open up Windows ‘Device Manager’, this can be accessed via ‘Control Pane’ > ‘Hardware and Sound’ > ‘Device Manager’ or by clicking ‘Start’ then typing ‘devmgmt.msc’.
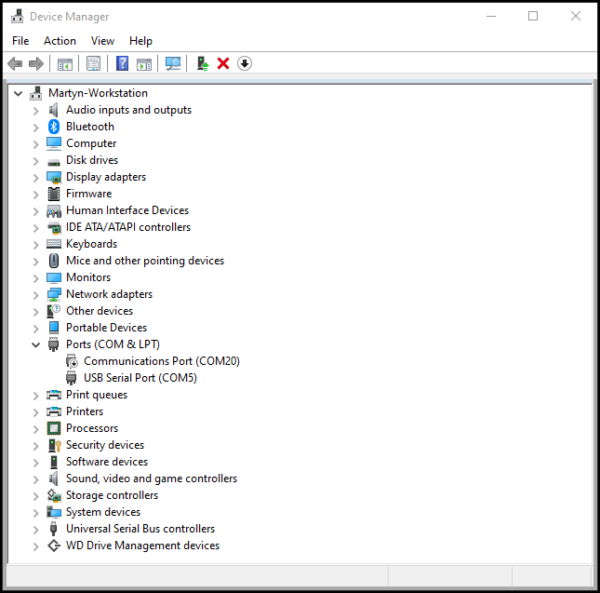
Once in ‘Device Manager’ locate the ‘Ports (COM & LPT) section and expand it out. Check to see what COM port your USB diagnostic cable has adopted. In the screenshot below mine had adopted COM5.
Your COM port number may differ from mine.
We must now change the COM port used by the USB diagnostic cable to COM1, we must also change the latency settings.
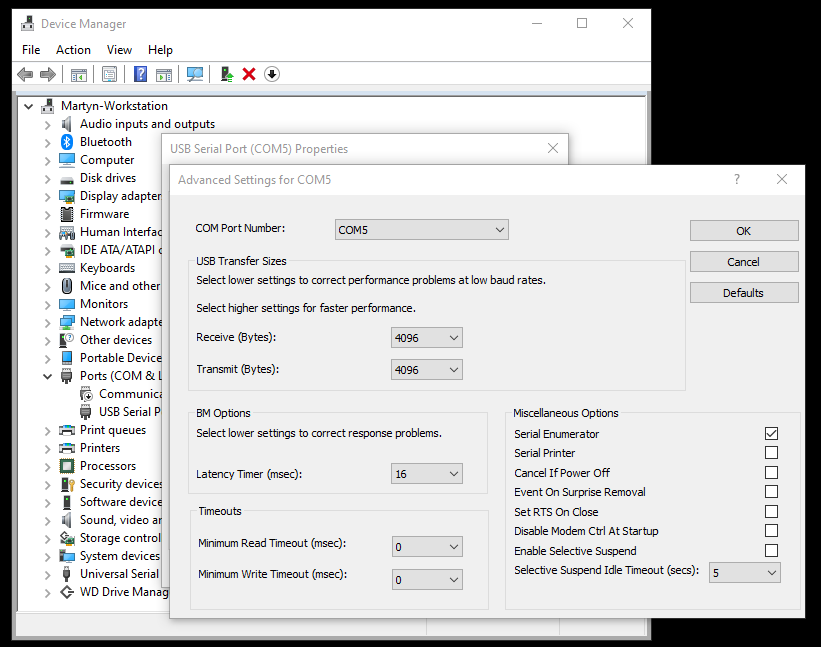
Double click your USB Serial Port, then click the ‘Port Settings’ tab, then the ‘Advanced…’ button.
If it returns ‘Unknown / Unsupported’ then please double check you have completed all of the above steps correctly.
If all is identified correctly then proceed to click ‘Read Full Flash’.
The ‘Full Flash’ read will take around 45-60 mins.

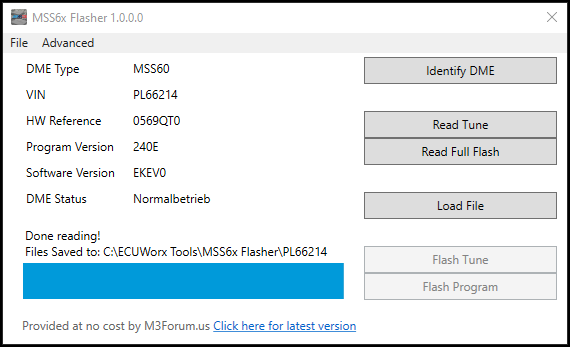
At this stage, I would also recommend that you backup your ISN/Secret key in case your DME becomes corrupt at any stage.
To perform the ISN/Secrete key backup simply click ‘Advanced’ > ‘Read ISN / Secret Key’.
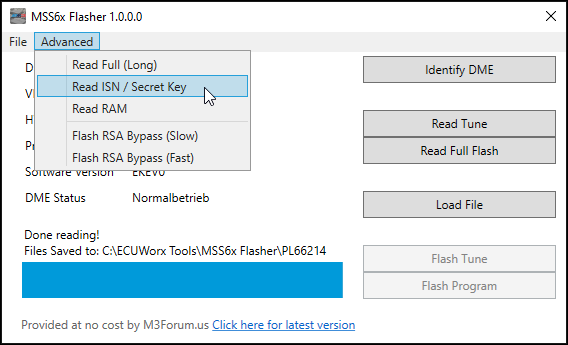
Your ISN / Secret key will be saved in the same location as your DME reads.
If you have an e9x M3 you will need to use the ‘Flash RSA Bypass’ option before flashing a modified tune, as per the MSS6x Flasher FAQ.
RSA bypass on the MSS65 / E6x M5/M6 is not required unless you wish to flash a modified program (required when doing an EWS delete).
Once the flash completes, you will need to cycle the ignition to clear any codes / warnings left on your dash.